No, no, this isn’t turning into a food blog, don’t worry. But it just happens to be blueberry season, and there are so many blueberry farms around here we’re having a festival. And because fibre and blueberries are legendary companions, the Surrey Museum is taking the opportunity to host a fibre event (a Pic-Knit!)at the same time. Which (here’s the real point coming up) I am going to have a table at. So if you’re in the neighbourhood, drop by and say hello! If not, wish me luck – it’ll be my first time pretending to be a professional amongst other professionals with an audience who mostly knows what they’re doing … ack! Fortunately I’ll be bringing along one or two of my sister’s gorgeous shawls, I can always hide under them until the people go away.
Blueberries!
July 31, 2011Eeeeee!
October 1, 2010I haz purple potatoes for dinner.
This isn’t them, but it’s what they look like:

That is all.
(Incidentally, I stole/borrowed the picture from this blog post that has a very tasty sounding recipe for them)
Himalayan Wild Fibres
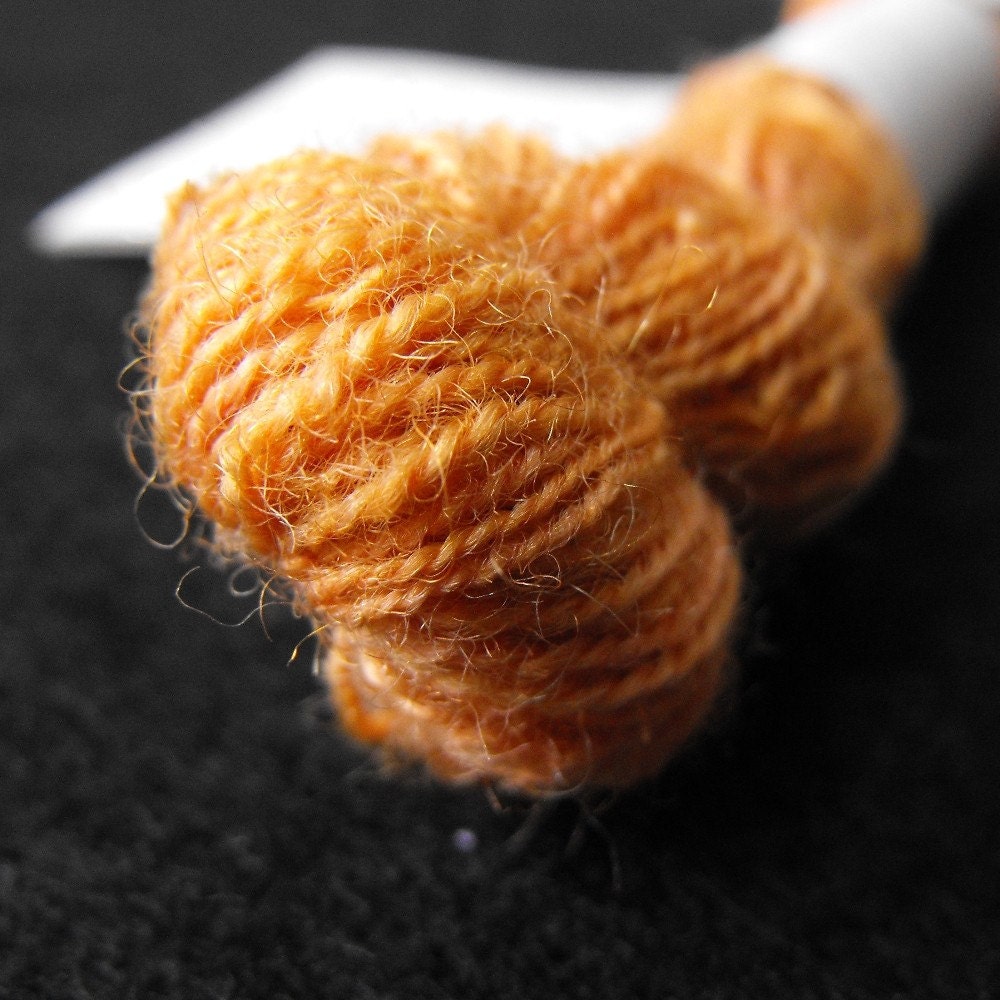
September 19, 2010About a month ago, I came upon a great opportunity. Saradippity of Ravelry found this website and, curious, she e-mailed Ellie, the woman in charge of it, to see if she could buy some of the fibre. It comes from the wild Himalayan stinging nettle, and has been traditionally harvested by Nepali men and women for generations. The Himalayan Wild Fibres project is attempting to develop a market for this eco-friendly fibre, hopefully providing supplementary income to thousands of families.
This is the fibre:

Ellie’s reply was that no, the fibre is not available for sale, at least not yet. However, she recognized that saradippity and the people of Ravelry represent a huge amount of textile expertise, not to mention a big slice of the potential market for any yarn that her enterprise produces. Because the whole point is to create jobs for people in tiny villages, there aren’t going to be any huge mills built to deal with this stuff. It’s manual technology all the way. As such, Ellie suggested that saradippity gather a few people together to do a study of the fibre. They get free samples of a fun new fibre to play with, and she gets all the results of thirty people’s experiments on yarn structure, blending with other fibres, different spinning and processing tools, and how it behaves when knitted, crocheted, and woven. Which is where I come in. I get to be one of the test people.
That alone is pretty cool, but that’s not the end of the story. A few days ago Ellie found out about the Ethical Fashion Source Expo that’s happening in London (England, not Ontario) on October 6th. She quickly contacted them and landed a spot. But what to do? All she has is some processed fibre, a bit of yarn, and maybe a Nepalese garment or two. Not much for the Western fashion world to relate to. Enter Team Ravelry! As I type, fibre is winging its way here, and I and the others will be spinning/knitting/weaving samples and zipping them off to London for the Expo. So. Not only do I get to help with this awesome project, I get to display my work at an international exhibition. Yay!

I’m expecting my bit of the fibre to arrive on Wednesday. In the mean time, I’m spinning up a fine single of hemp to use for warp, then the nettle yarn will be weft. I just have to come up with a fabric that will show it off as well as it possibly can.
Weaving
September 1, 2010I’ve been teaching my boyfriend how to weave, which means that I’ve been doing a bunch of it myself, too. It’s probably a bad thing, but I take pity on his giant man-hands and have done a significant part of the warping for him. And a bunch of the weaving too, but hey – I like it! And there’s only one loom. As a result, we’ve completed three joint projects over the past couple of months. I forgot to take a picture of the first one (of course!) but here are the other two:
Number One: Double Weave Lap Blanket
I have a table loom, which means that usually I can only weave fabrics that are up to about 20″ wide. 24″ if I really push it. But there’s a totally magical technique that involves weaving two layers of fabric at once, doubling the width potential without spending a couple thousand dollars on new loom. Not to mention a new apartment that would fit a new loom. Though we could probably squeeze in one of these. Anyways, to make a short story short, that’s how we made this blanket.

If you look really carefully you might be able to spot the slight line down the middle from where it was folded. The weft is handspun Shetland, from a nearby flock. I got it at a fibre festival in March. The red bits are some madder-dyed Corriedale that I had lying arond. The warp is from a cone that I got back in school when somebody destashed and brought a giant box to us and said “Here!”. It’s a wool single (not plied).
In case anybody out there is thinking about using a single for their warp, I’ll tell you a secret: Singles, as most spinners should realize, untwist when you suspend them with a weight on the bottom. So if, for example, your warp is a single, and one or two threads break so you do the normal thing, reattaching it and hanging a weight off it to give it some tension, and then you can’t figure out why the broken threads just keep breaking, think about that first sentence again. Yeah, it’s not breaking, it’s untwisting itself and drifting apart. Dummy.
After washing it fluffed up quite beautifully. It’s wonderfully soft now.

And number two: a runner for my new Fibre Chest in the living room ($15 plus several hours of sanding and staining – much better than small table piled in stuff).
Cotton, mainly herringbone patterned, with some basketweave thrown in for contrast. After the tying the ends of the first project and twisting the ends of the second project, it was time for DBF to learn hemstitching. Here it is part-way done:

But wait! What’s that giant black blob under the loom?

Oh. Hi Sayiidi. Comfy?

Apparently. Fortunately the claw marks mostly came out. Ta da!


Oh look, there’s cat hair on it. Sigh.
And if you’re wondering why I seem to have way more pictures of Sayiidi than Nova, it’s not actually true. I have lots of pictures of Nova. They just all look like this:

Tendinitis, or Fibre Arts and Martial Arts Don’t Mix
August 19, 2010Did I ever mention that I’m kind of the boss of a martial arts school? Or, to be more accurate, I’m the boss of a few people who are working like heck to get one going. This is us. Anyways, we started running weekly classes in March, which turned into a weekly class and a weekly private lesson, which turned into a small group lesson, and now we’ve started doing regular instructor training days so I’m up to three days a week, two or three hours at a time. Did I mention that it’s swords? And wrestling? And punching? Not exactly nice on the wrists. All of that, combined with the fact that in May I started to spin for my life (well, living anyways) means that by the end of June my wrists were hurting, particularly the right one. Yes, I stopped and stretched regularly, but going from occasional light work to many hours of hard labour all at once was too much.
I had a break in July when I went to visit my parents in Newfoundland, but it didn’t get better. I couldn’t do pushups, or use my right hand to push myself up out of bed. But I kept hoping that it would get better by itself, and I kept using it. Yeah, it didn’t get better. So when I woke up extra sore on Tuesday after a couple of hours of sparring on Monday I finally accepted that it really was tendinitis, and it wasn’t going away by itself.
Now I’m going around with a tensor bandage on, icing it before and after workouts, lots of massage, and mostly just trying not to use it for much of anything. No spinning, no knitting, no punching, no pushups. And after a couple of weeks I’ll start to slowly build it back up to full strength. And then, because I don’t want this to happen again, and certainly not to any of our students, we’re starting a gymnastics wrist conditioning program. Actually they started it on Tuesday. I sat it out.
And I’m off!
July 8, 2010I leave in the morning to visit my parents and younger sister for two weeks, that will probably be filled with assorted fibre-y pursuits. Whether that means more or less blog posts remains to be seen. It will mean less shop updates, since I spent the past little while stocking up on yarn and then ran out of time to take pictures of it, clever being that I am. Oh well. There are thirty-one items in the shop already, and since none of them have sold yet I don’t think I’ll have problems maintaining stock levels while I’m gone. Sigh.
I’m bringing two spindle spinning projects (silk/linen for weaving and cotton for learning), two knitting projects (complicated silk lace shawl and easy alpaca shawlette) plus yarn and needles for a back-up pair of socks, a bunch of fibre that turned out to be crap for spinning that we’re going to felt, and about a pound and a half of raw wool (Clun Forest and Romney) to dye and put through Mum’s drum carder. Think that’ll keep me quiet for two weeks? I also brought an extra spindle in case I have to start spinning the batts, too.
Renate Hiller “On Handwork”
July 4, 2010This was posted to one of my groups on Ravelry today, looks like another one for my list of people who speak more eloquently about fibre than I do.
Merino Vs. Blue Face Leicester
June 15, 2010This morning I went to my pile of dyed wool that’s waiting to be spun, and pulled out a bunch of lovely soft stuff, that I remembered dyeing with logwood a couple of weeks ago. Only one problem. I couldn’t remember if it was Merino or BFL. Fortunately, I was clever and figured it out with my specialized problem-solving device – Knowledge! Forcing myself to review what I know about the two breeds got me thinking about all the places I’ve seen wool for sale with descriptions like “It’s just like Merino but easier to spin!” when there are actually quite a few differences between them. So I wrote up a giant explanation of them and posted it to the shop blog. I like having educated customers.
It’s mostly based on my own experiences and opinions with them, so I would be happy to hear if anybody has had different ones. I like being educated too!
Garden Update
June 12, 2010There is new hope for the dye garden! Yesterday I finally got around to planting some new madder, dyer’s chamomile, and lady’s bedstraw in my containers.

Madder in the big one, bedstraw in the two red ones, and chamomile scattered between the three. And yes, if you’re wondering, my planters are an old barbecue and Ikea garbage cans.
What prompted this, aside from the fact that I should probably have done it weeks ago? We got a barbecue! Yay! But it needed somewhere to go. So yesterday we turned the pile of jumbled mess into this:

My new outdoor grilling/dyeing/whatever station. It looks much nicer than it did before, and having everything stashed under the table makes me less worried that the upstairs neighbour’s kids are going to get into anything they shouldn’t. We got the giant white barrel at the homebrew store for $10. Not sure yet if it will be a large cold-water dyepot or a planter or two, or a water barrel, but it will come in handy somehow.
Now I just have to decide if I want to get an electric hotplate or a propane stove to dye with out there. I’ll be happy to get the dyeing out of the kitchen, that’s for sure.
The rest of the garden is doing pretty well, despite the big rainstorms we’ve been having.
The first strawberries are almost ripe:

The clematis is starting to take over the railing up the stairs, and it has tons of buds:


This year’s woad is thriving in the cold, wet weather (think it’s from Britain?):

And last year’s is safely cocooned in cheesecloth, I’m sure the neighbours think we’re insane.

The foxglove, that for all of last year I thought was a weed, is flowering:

And it has a friend who I’m VERY glad to see, given our aphid problem.

And finally, the rosebuds also started to open in the last few days:


The sweet peas are exploding too, but I didn’t get a picture of them. I’m not going to bother starting them inside next year, the ones I planted directly in the garden are four times larger than the ones I transplanted at the same time.
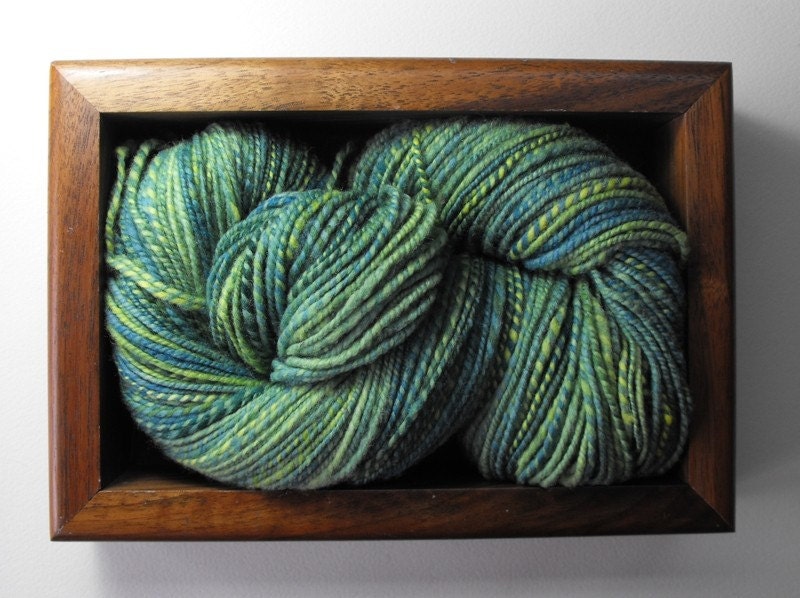
This is why I love spinning.
June 8, 2010This yarn, right here. It’s BFL wool, silk, and alpaca, spun up into a light worsted weight 2 x 2 cable. 70 grams, 81 metres.

Now, some people might say (and have said) something along the lines of “But why would you want to spin something so even, you can hardly tell it wasn’t mass produced.” They would, of course, be dead wrong.
This yarn began in at least three very different parts of the world, and traveled quite a ways, through many transformations to get where it is now. Shall I tell you it’s story?
Let’s begin with the wool. Blue Faced Leicester, the new Merino and every spinner’s best friend. It was grown on kind of an ugly sheep, who looked something like this lady here:

One nice spring day, while frolicking in a field with her babies, the poor thing was attacked, wrestled to the ground, and shaved. How humiliating! Her dirty, stinky, sweaty fleece was then sent away, never to be seen again. Somebody washed it, picked out the bits of hay, and sent it through a giant combing machine. I confess, I don’t know much about the actual industrial process, but in one way or another the fleece was cleaned and picked and stretched and combed until it looked like this:

Once it was prettified, it was packaged up in little baggies and sent off to the lovely Colleen at Flannelberry Fibre. Who is awesome and everybody should buy stuff from her. From there it was just a short trip over the mountains to me.
The alpaca grew on (drumroll please!) an alpaca. Named Allie. She belongs to Judith Elder-McCartney, a friend of my mother’s, and lives on a farm in Seaforth, Ontario. She probably looks a bit like this, only more feminine (this one’s a boy):

She underwent a similar treatment as my anonymous BFL sheep, though I’m not sure if alpacas actually get wrestled to the ground quite the same way as sheep do. Her fleece was washed, and sent off on a trip through the giant spinning wheels of spiky death known as a drum carder. Have you ever seen a big one in action? There’s a video here, fast forward to about a minute in if you don’t want to listen to the reporter getting overly excited about wool. And then it too was stuffed into a bag and shipped to me.
The silk didn’t grow on anything. It was, in fact, spat out by worms. Big, fat, white worms.

Which everybody knows, but it’s still fun to say it. Anyways, the magical silk worms lived in China. At least a few hundred of them, possibly more, spat their little hearts out to make this yarn. From China, the cocoons were sent to Camenzind + Co. AG in Switzerland. According to their website, the family business has been around since 1892 and they’re in their fifth generation of silk production. That’s pretty cool. They did their thing and made all the leftover bits from reeling into lovely combed silk top, and shipped that off to Eve Kriss at The Silk Tree. She put it in baggies and brought it to the Silk Weaving Studio where I bought it, after wiping the drool off my chin from looking at their insanely gorgeous weaving. If you’re wondering, the drool did not harden into silk. I was vastly disappointed.
Ready to spin? Not quite – you may have noticed that the yarn is not, in fact, white. Not even white and grey, as would be more likely given the colour of the alpaca. No, I must include the dye in this story also. I might be tempted to skip it, except it came from Maiwa. I’m almost sorry to say that I used acid dyes on this yarn, not indigo. But I haven’t brought my indigo vat back to life yet after the winter and my acid dyes were all ready to go, in solution and everything. Oh well.
Anyways, Maiwa. If you haven’t heard of them, you can thank me later. Maiwa was started a couple of decades ago by a woman who liked textiles, and natural dyes, and didn’t want them to go away. What started with a single purchase of a single item on a trip around the world became a mission, and since then they have taught countless people in rural Asia how to use natural dyes again, and sought out people who know how to weave, how to work with leather, how to block print, and helped spread those skills around, importing all the resulting goodies to Vancouver. And if all that wasn’t enough, they do the same thing here, teaching workshops on dyeing and weaving and knitting and keeping us all well supplied with everything we need to do those things. So. My acid dyes came from Maiwa, and even if they were manufactured in a lab somewhere instead of being extracted from leaves, they still did their tiny part to support a huge textile legacy.
I didn’t actually measure the dyes for this one, except to be sure that I had enough to make it a nice deep blue. I threw in a bit of everything – lots of blue, a good bit of black, some red, some yellow. I went against my training, which was to dye perfect, uniform colours. Fabric can look a bit dorky when it’s muddled in the dyebath, but less-than-even fibre leads to yarn with great depth, much more interesting than a flat blue. I threw the silk in as a last-minute thought and it did what silk does and grabbed all the dye it could, gobbling it up before it could even penetrate into the centre of the roving.
The spinning itself was actually pretty uneventful. I did actual samples, which is unusual for me. I wanted to figure out how to include the alpaca. I tried a couple of techniques, and settled on encasing it between the two plies, then cabling them together to hold it in place just a little bit better. So that’s how I spun it. Spread out over a couple of days because I was working of other projects. Swore at the silk a bit, it’s so slippery and always goes a bit weird when it’s dyed. The plying was fun – if you’re a spinner and haven’t tried encasement, you should! Even if it does make plying slower.
Winding the yarn into a skein is always my favourite part. You can finally see it all at once, not just a bobbin-layer at a time, and it’s free to do what it pleases, no longer held under constant tension and control. This is the first yarn I’ve spun in a while that’s a blend of fibres other than wool, and it’s a bit surprising how palpable the difference is. It is smoother shinier, fuzzier, heavier, and drapier. The cabled structure means it is very strong, and whatever is made from it will last a very long time, an elegant heirloom or maybe just a scarf that will last many winters. I looked at it every which way, twisted, hanging loose, by the window and under a spotlight. I petted it a lot.
And then it was over. I wet-finished it, hung it to dry, and then there was nothing left to do but take pictures and reluctantly list it in the shop.
So there you are. The creation of this yarn supports nine different businesses, not counting my own, from all around the world. Plus at least seven shipping companies. And it’s gorgeous.
I named it Man-Eating Squid.